

Since the invention of engraving technology, the tools used for engraving have evolved, from the very first engraving to to laser engraving machines, the difficulty factor of the engraved work has also increased. But if you want to do your own engraving of jewelry or other metal parts at home, you just need to have simple engraving tool. Alternatively, if you have some budget and want to increase your engraving efficiency, you can go for a professional jewelry engraving machine. Today, this article is going to show you how you can learn to engrave on your own at home.
Choosing the right engraving tool
If you are a novice engraver, you can choose one of the more popular pneumatic engravers on the market today as your engraving tool. Pneumatic engravers are considered a more affordable option for first time engravers. If you buy a pneumatic engraving machine, it comes with a set of the more common engraving cutters. Generally speaking, the engraving tool that comes with it will already be able to fulfill your daily needs.
Of course, if you don’t want to buy a pneumatic engraving machine, you can also use the most primitive engraving cutter together with a small hammer. Carving in this way can let you feel the fun of hand-carving to the greatest extent. Only this primitive carving tool and the above pneumatic engraving machine compared to, need to spend time and energy is certainly more. And the original engraving tool can carve the category of metal is limited, some of the harder texture of the metal is more difficult to carve.
Enough practice is necessary
If your goal is to engrave on precious metals, you may need to practice a lot on some non-precious metals. Taking precious metals for engraving on the one hand will cost you a lot of money, whereas if you engrave with those inexpensive materials, the cost of engraving becomes lower. The more recommended material here is brass alloy.

Cleaning the metal is a necessary preparation
Before you engrave metal, whether it has stains on it or not. You will need to clean the metal thoroughly. You can choose to clean the metal with diluted soapy water. Of course, if you have the means, you can also choose a specialized cleaner to clean the metal. However, whether you choose soapy water or a specialized cleaner, you need to wipe the surface of the metal clean after use before proceeding with subsequent engraving operations.
If the metal you are engraving is a metal with a protective coating like brass, you can remove the surface without removing the coating. However, after engraving, the color of the metal surface may not be as uniform. With that in mind, you may just need to color the metal again with a coating material after engraving.
Draw a draft or print out a draft
If the style you’re carving is one of those particularly complex patterns, or if the size of the material you’re carving is particularly small. I suggest that you draw out your design in advance in advance. Of course, if you have the means, you’d better print out your design. Before engraving, you can use a marker to draw the design directly on the metal. You can choose to draw the pattern with a pencil, or if the metal you are engraving is darker in color, you can mark the metal with a white marker.
Reproduce your design on metal
If you’re afraid that you won’t be able to draw the pattern in its entirety, here might be another way to help you. That is you can tape your pattern to the metal. The details of how to do this are as follows.
First, you need to envision roughly how big the area you need to carve is. Then apply varnish or bug glue to this area. The purpose of this is to make the surface of the metal somewhat sticky to adhere to the pattern.
Afterwards, draw your pattern with a pencil directly onto the polyester film, where what you’ve drawn is what you’ll end up gluing onto the metal.
Take out a large enough piece of clear tape and place it over the pattern you just drew. You can gently press the tape to ensure that the pattern will be fully adhered to the tape. Then you will slowly lift the tape, being careful not to break the tape or the mylar. This will undo all the hard work you have done earlier.
The last thing you need to do is to stick the pattern on the tape directly onto the metal area that has just been treated. Again, gently press the tape with your fingers to ensure that the pattern is fully adhered to the metal. Once you have gently removed the tape, you will realize that the pattern has been adhered to the metal. This time it will be easier for you to engrave.
Secure your metal material
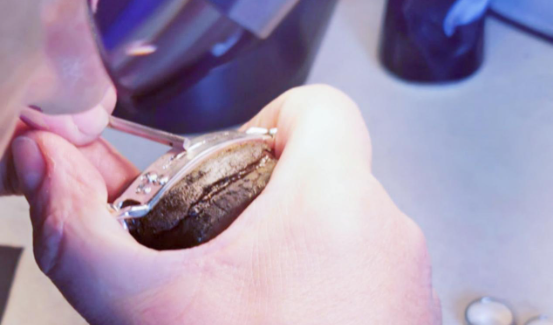
Before you start carving, you need to secure your metal material. Doing this will not only make your carving process easier, but it will also keep you safe.
There are many tools available in the market for fixing metal. You can opt for a handheld jig. A handheld jig is one where you need to hold the jig in one hand while you work on the engraving with the other hand. But this is still not very safe.
There is also a jig that can be secured to a tabletop so that you can use both of your hands to carve at the same time. And this time if you are using a specialized pneumatic engraving machine, or a chisel with a hammer which is one of the two ways of engraving. Then the jig that is fixed on the table is the best for you.
Another tool that is also very handy and useful is the engraved ball vise. This tool can hold the metal block firmly. And the ball vise on the market comes with a lot of small parts. You can use these widgets together with the ball vise. This way you can easily carve things like rings that don’t hold well.